
.png)
Writing a book is one of the most rewarding things you can do as a professional—but it can also feel overwhelming before you even type the first word.
I’ve coached and ghostwritten for over 130 authors, and here’s the most consistent problem I see: they overcomplicate the process. They spend weeks researching the “perfect” writing software, testing tools they don’t need, and avoiding the one thing that actually matters—getting their ideas onto the page.
That’s why I recommend Google Docs to nearly every author I work with. It’s simple, free, cloud-based, and powerful enough to take you from first draft to final manuscript. You don’t need fancy software to write your book—you need structure, clarity, and momentum.
In this guide, I’ll walk you through the exact process I use with clients to write a complete book in Google Docs, step by step. I’ll also share a Google Docs book template that’s helped dozens of writers avoid formatting headaches and stay focused on what matters most: writing.
Let’s get you out of analysis paralysis and into action.
No time to read this article and format a template? Click here.
Table of Contents
- Why Google Docs Is Still the Best Tool to Write a Book
- Clarify Your Book’s Concept and Core Message
- Setting Up Google Docs for Success
- How to Create a Book Outline That Guides the Writing
- Formatting Your Book in Google Docs (Without Overthinking It)
- How to Use a Live Table of Contents (TOC) to Navigate and Focus
- Build Momentum: Set Daily Word Goals or Use Time Blocks
- Subheadings and Transitions that Engage Readers
- Collaborating Inside Google Docs Without Losing Control
- Improve Your Draft With Beta Readers
- After the First Draft: Edit, Export, and Choose Your Publishing Path
- Hidden Google Docs Features Authors Shouldn’t Ignore
- Save Hours with This Free Google Docs Book Template
- This Is Where Your Book Actually Begins
Why Google Docs Is Still the Best Tool to Write a Book
If you’re planning to write a book, chances are you’ve come across tools like Scrivener, Ulysses, or Microsoft Word. They promise features specifically for authors—chapter organization, corkboards, character databases. But for most writers, these features become friction.
You don’t need more features. You need fewer obstacles.
That’s why I recommend Google Docs to every new author I work with. It’s not just “good enough.” It’s the most practical and powerful tool for writing a full-length book—especially if you’re focused on execution over aesthetics.
Here’s why Google Docs works so well:
-
It’s free and cloud-based: All you need is a Google account and an internet connection.
-
It auto-saves everything: Every keystroke is stored instantly, so you never lose work.
-
You can write from anywhere: On your laptop, phone, or tablet.
-
It’s distraction-free: No bloated menus, no bells and whistles. Just a clean writing space.
-
It’s built for collaboration:Editors, beta readers, and co-authors can comment directly in the doc.
As a ghostwriter and coach, I’ve completed entire manuscripts in Google Docs—dozens of them. And I’ve helped 130+ clients do the same.
Whether you’re writing a thought leadership book, a how-to guide, or a memoir, Google Docs gives you a fast, simple workflow that doesn’t get in the way of your creativity.
If you’re still searching for the “right tool,” consider this your permission to stop. Here’s the exact list of tools I recommend for every writer. But for writing your manuscript, Google Docs is more than enough.
Let’s set up your workspace so it works with you, not against you.
Clarify Your Book’s Concept and Core Message
Most aspiring authors don’t get stuck because they lack motivation. They get stuck because they start writing before they’re clear on what they’re writing—and who it’s for.
That blank Google Doc feels intimidating when your message is still fuzzy. That’s why, before writing a single chapter, I help every client develop a crystal-clear concept. Once your idea is sharp, the rest falls into place: your outline, your chapters, your momentum.
Here’s the framework I use to clarify a book idea—whether I’m writing it myself or guiding a client:
-
What transformation will the reader experience?
-
Who is this book for? (Be specific—“entrepreneurs” is not enough.)
-
How is your approach different from others in your space?
These three questions force you to define your book’s value, audience, and positioning. Whether you’re writing a leadership book, a personal memoir, or a how-to guide, this clarity saves you months of second-guessing later on.
Pro tip: Start a new document titled “Book Concept & Outline.” This is your sandbox. Use it to brainstorm titles, write short positioning statements, jot down stories, or list reader pain points.
If you’re stuck on idea development, I’ve written an entire post to walk you through the brainstorming process—complete with real prompts and examples from client sessions. You can read it here.
Some authors clarify their concept in a single afternoon. Others take days. Either is fine. The key is to avoid the temptation to start writing chapters before your idea is fully baked. Once your concept is dialed in, outlining and drafting become infinitely easier.
Setting Up Google Docs for Success
Once your book idea is clear, your next step isn’t to start writing—it’s to set up your environment for success. A disorganized workspace leads to distraction. A clean, intentional setup creates momentum.
I always recommend creating two separate Google Docs before you begin:
-
Your Manuscript: where you’ll write your actual book.
-
Your Outline – your creative sandbox, where structure takes shape.
Keeping your draft and outline separate allows you to write freely without constantly rearranging chapters or second-guessing your structure.
How to Set Up Your Documents in Google Drive
-
Go to your Google Drive and click + New > Google Docs
-
Name your documents clearly:
-
My Book Project (your manuscript)
-
My Book Outline (your structure/notes)
-
Then create a dedicated folder for your project to store:
-
Your manuscript
-
Your outline
-
Feedback files
-
Reference documents
This becomes your digital book studio—accessible from any device, at any time.
Customize Your Google Docs Writing Environment
Make your manuscript document easy to read and work in every day:
-
Font: Georgia, Garamond, or Arial
-
Font size: 12 or 14 pt
-
Line spacing: 1.15 or 1.5
-
Margins: 1 inch on all sides (Google’s default)
-
Page breaks: Use
Insert > Break > Page BreakorCtrl + Enter(Cmd on Mac) between chapters
Pro Tip: Add a simple, clean title page at the top of your manuscript:
-
Book title (centered, bold, large font)
-
Subtitle (optional)
-
Your name
-
Optional: location + date at the bottom
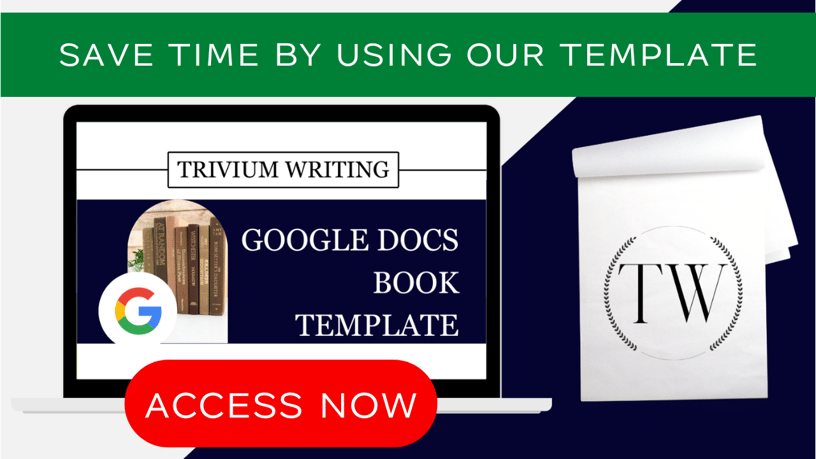
If you want to skip formatting altogether, I’ve created a free Google Docs book template that includes pre-set spacing, headings, a formatted title page, and built-in Table of Contents logic.
How to Create a Book Outline That Guides the Writing
Your outline isn’t just a list of chapters. It’s your creative roadmap—and if you get it right, it makes the writing process 10x smoother.
I’ve worked with dozens of authors who were stuck halfway through their manuscript—not because their idea was bad, but because they didn’t build a clear structure before they started writing.
Whether you’re writing a business book, how-to guide, memoir, or leadership playbook, your outline needs to:
-
Keep you on message
-
Prevent repetition
-
Guide the reader from point A to transformation
Start With a Proven Framework
In your outline document, begin with a rough chapter list. Don’t worry about perfect titles—just jot down each chapter’s purpose or promise.
Here are a few structures I’ve used with clients:
-
Chronological (best for memoirs and personal journeys)
-
Thematic (great for big ideas or values-driven books)
-
Problem-Solution (ideal for how-to or business books)
If you're writing a hybrid—part personal story, part teaching—I recommend the Hybrid Planning System (HPS) I developed at Trivium Writing. Each chapter follows four elements:
-
Big Idea – What’s the key takeaway?
-
Story or Context – What illustrates this point?
-
Application – How does the reader use this?
-
Transition – What leads naturally into the next chapter?
This structure ensures every chapter earns its place. It also makes editing easier later—you’ll know if a chapter lacks depth or breaks the flow.
Think of Your Outline as a Living Document
Don’t try to make your outline perfect on day one. Just give yourself enough structure to write with confidence.
-
Add placeholders for stories, studies, or examples
-
Leave comments for ideas you want to revisit
-
Include notes on tone or target reader concerns
Your outline should serve your writing—not stifle it. It’s okay if it evolves as you go.
If outlining has tripped you up in the past, or you’ve never done it from scratch, keep it simple. Start with bullet points, group them into rough chapters, and refine as you build momentum.
Formatting Your Book in Google Docs
Formatting may not be the most exciting part of writing a book—but if you get it wrong, it can create friction every time you open your manuscript.
The good news? Google Docs makes formatting simple, and you don’t need to get fancy. You just need your document to be clean, consistent, and easy to navigate.
Set Up a Clean, Professional First Page
Your title page sets the tone for your project—even if it’s just for your eyes (or your editor’s). Here’s a quick setup:
-
Title: Bold, large font, centered
-
Subtitle (optional): One line below, slightly smaller
-
Author name: Centered below
-
Location & Date (optional): Bottom of the page
After your title page, insert a page break (Insert > Break > Page Break) to ensure your manuscript starts cleanly on the next page.

Choose Reader-Friendly Formatting Settings
These small adjustments go a long way toward making your document easier to write in (and edit later):
- Font: Georgia, Garamond, or Arial
- Font size: 12 or 14 pt
- Line spacing: 1.15 or 1.5
- Margins: 1 inch (default setting)
You can adjust these in Format > Line spacing or File > Page setup.
Consistent formatting now prevents hours of reformatting later—especially when you export your manuscript for editing or publishing.
Use Heading Styles (Not Just Bold Text)
Google Docs comes with built-in heading styles that are more than visual—they’re structural. They help you build a navigable Table of Contents and keep your manuscript organized.
Here’s how to use them:
- Heading 1: Chapter titles
- Heading 2: Section or subheadings
- Normal Text: Body content
You can update each style by formatting the text how you like, then selecting Format > Paragraph styles > Update “Heading 1” to match. This ensures visual consistency and functionality.

How to Use a Live Table of Contents (TOC) to Navigate and Focus
Most writers think the Table of Contents is something you add at the end, but in Google Docs, it’s a tool you should build early and use often.
A live Table of Contents keeps you focused, helps you navigate your draft quickly, and shows you how your book is shaping up—all while you write.
How to Insert a Table of Contents in Google Docs
Once you’ve applied Heading 1 to your chapter titles, here’s how to create your TOC:
- Place your cursor where you want the TOC (usually right after your title page)
- Go to
Insert > Table of contents - Choose a style (with or without page numbers)
Google Docs will auto-generate your Table of Contents using the headings in your document. Every time you update a chapter title or add a new section, you can click the refresh icon in the TOC to update it.

Why the TOC Is More Than Just a Navigation Tool
Think of the TOC as a live map of your book’s structure. It lets you:
- Jump between chapters without scrolling
- Spot structure issues or content gaps early
- Share a high-level view with your editor or coach
- Build confidence by seeing real progress
If you’re writing a long book, this feature alone will save you hours.
Use the Document Outline for Even Faster Navigation
Want a sidebar view of your book’s entire structure?
Go to View > Show Outline or click the outline icon on the left-hand side. This will create a clickable list of all your headings—perfect for jumping to any section instantly.
Between your TOC and outline pane, you’ll never lose your place again.
Build Momentum: Set Daily Word Goals or Use Time Blocks
Most people who start writing a book never finish—not because they lack talent, but because they never build a rhythm.
I’ve seen this over and over with the authors I coach. They write in bursts, wait for inspiration, or get stuck chasing perfection in the first draft. But here’s the truth: the books that get finished are written consistently, not perfectly.
Start Small: 500 Words a Day
You don’t need to write thousands of words each session. If you commit to just 500 words a day, here’s what that adds up to:
-
3,500 words per week
-
15,000 words per month
-
A full 60,000-word manuscript in four months
This slow-and-steady approach builds momentum, not burnout. And momentum is everything.
To track your word count in Google Docs:
-
Go to
Tools > Word count -
Or press
Ctrl+Shift+C(Cmd+Shift+C on Mac) -
Check the box that says “Display word count while typing”
This gives you instant feedback as you write—and seeing that number go up helps you stay motivated, especially on slow days.

Try Time Blocking Instead
If word counts feel like pressure, try time-based writing sessions instead.
Set a timer for 25, 45, or 60 minutes and write without stopping. Don’t edit. Don’t pause to reread. Just generate content.
This is the method I use with clients who struggle with consistency. Many finish their entire first draft by showing up for one focused session a day.
Bonus: Use Voice Typing to Draft Faster
Google Docs includes a built-in voice typing feature that’s surprisingly accurate. It’s great if you think faster than you type or want to free yourself from the keyboard:
-
Go to
Tools > Voice typing -
Click the microphone icon
-
Start speaking
You can draft while walking, commuting, or just to break through mental blocks. Several of my clients have dictated entire chapters this way.
No matter your method—word goals, time blocks, or voice typing—what matters most is showing up. Your job in the first draft is to get the ideas out of your head and onto the page.
Writing With Flow: Subheadings and Transitions that Engage Readers
Even if your ideas are strong, poor structure can make your book hard to follow. Long paragraphs, vague transitions, and missing section breaks all lead to the same result: readers check out.
One of the simplest ways to improve your book’s clarity and readability is to use clear subheadings within each chapter.
Why Subheadings Are Essential in Nonfiction
Subheadings do three things well:
-
They break up long blocks of text (reducing reader fatigue)
-
They signal what’s coming next (boosting clarity and flow)
-
They make editing easier (by surfacing structure)
A good chapter might cover one big idea—but that idea usually contains 3–5 supporting insights. Each of those deserves its own section, framed by a subheading.
How to Format Subheadings in Google Docs
Use Google Docs’ built-in styles—not just bold text. This keeps formatting clean and your Table of Contents functional.
-
Heading 1: Chapter titles
-
Heading 2: Main subheadings
-
Heading 3: Nested sub-points (optional)
-
Normal text: Body copy (never apply heading styles here)
You can format subheadings manually and then use Format > Paragraph styles > Update “Heading 2” to match for consistency.
This structure isn’t just visual—it also shows up in your document outline and Table of Contents, making it easier to navigate and revise your manuscript.

Write Subheadings That Guide and Hook
A strong subheading should feel like a mini-headline. Instead of “Tips for Editing,” write something more engaging like:
-
Why Revising Before Editing Saves You Time
-
How to Avoid Losing Your Voice During Rewrites
-
The 3 Most Common Mistakes First-Time Authors Make
This keeps the reader curious and gives your book a natural rhythm. Even if someone is skimming, your subheadings should tell a coherent story.
Use Transitions to Keep Readers Moving
Good transitions are invisible bridges. They carry the reader from one point to the next without jarring shifts.
Try phrases like:
-
“Now that you understand X, let’s explore Y…”
-
“Here’s how that plays out in real life…”
-
“But before we move on, consider this…”
When you combine great subheadings with smooth transitions, your book becomes easier to read—and harder to put down.
Collaborating Inside Google Docs Without Losing Control
Writing a book may feel like a solo project, but if you want to produce something polished, you’ll eventually need input from others.
This is where Google Docs gives you a major advantage. You don’t need to juggle multiple file versions or wonder who made what change. Everything lives in one place, and you control access with a click.
Share Your Manuscript the Smart Way
In the upper-right corner of your document, you’ll see the Share button. Click it to open collaboration settings.
Here’s how I recommend assigning access:
-
Commenter: Beta readers, test readers, or sensitivity reviewers
-
Editor: Professional editors, writing coaches, or co-authors
-
Viewer: Anyone you want to share the book with, but not invite to change it
This makes feedback frictionless. Your collaborators can highlight sections, leave suggestions, or ask questions—without altering your original text.
You stay in control the entire time.

Track Changes Without the Chaos
Google Docs automatically saves every edit and tracks your document’s full history.
To view previous versions or restore earlier drafts:
-
Go to
File > Version history > See version history -
Name important stages (e.g., “First Draft Done,” “Post-Beta Revisions”)
-
Revert or copy text from any version with one click
This eliminates the need for messy filenames like “Final_draft_v6_REALLY_FINAL”. You’ll always know where you are in the process—and how you got there.
Keep Your Files Organized in Google Drive
For every book project, I recommend creating a dedicated folder that includes:
-
Manuscript (main draft)
-
Outline (living structure doc)
-
Research/reference materials
-
Feedback files and summaries
-
Notes from coaching or editing sessions
Keeping everything in one place means you never have to dig through old emails or downloads again. And since Google Drive syncs automatically, your files are always up-to-date across devices.
Improve Your Draft With Beta Readers
Once your first draft is done, don’t rush to edit it yourself. You’re too close to the material. You need fresh eyes—people who can see your book from a reader’s perspective.
Enter: beta readers.
These are trusted individuals who read your manuscript and give early feedback. They’re not editors (yet), but they’ll help you understand what’s working, what’s unclear, and what needs to go.
Choose the Right Beta Readers
Great beta readers:
-
Understand your target audience or subject matter
-
Offer honest, constructive feedback
-
Know how to spot clarity issues (not just grammar)
-
Are comfortable commenting in Google Docs
You can recruit them from your network—colleagues, past clients, peers, or ideal readers. Aim for 3 to 5 people. More than that becomes unmanageable.
Share Your Doc With Commenter Access
Give your beta readers Commenter access through the Share button in Google Docs. Ask them to:
-
Highlight any confusing sections
-
Point out slow or repetitive areas
-
Suggest improvements, but don’t rewrite text
This keeps feedback centralized, actionable, and easy to review. You can resolve, reply to, or ignore comments as needed—all without breaking your draft.
Use a Three-Phase Editing System
To avoid spinning your wheels, move through editing in clear phases:
-
Revise for structure and flow (based on beta feedback)
-
Copyedit for grammar, clarity, and tone
-
Proofread for typos, punctuation, and formatting
Each step has a purpose. Resist the urge to do all three at once. Google Docs supports this workflow beautifully—you can even invite different collaborators for each phase without starting over.
After the First Draft: Edit, Export, and Choose Your Publishing Path
Finishing your first draft in Google Docs is a huge milestone—but your work isn’t done. What you do after you finish writing will determine how professional (and publishable) your book becomes.
Thankfully, Google Docs makes the editing and export process smoother than most tools. You can transition straight from manuscript to editor to publishing platform—without ever leaving your Drive.
Exporting Your Book from Google Docs
Most editors and publishing platforms prefer working with Microsoft Word files. Once you’ve revised your draft, it’s time to export:
-
Go to
File > Download > Microsoft Word (.docx)for editing or publishing -
Use
File > Download > PDFif you want to share a polished version with early readers or stakeholders
Pro tip: Finalize your formatting and heading structure before exporting. This prevents layout issues when you move to another platform like Amazon KDP.
Decide: Self-Publish or Pitch to a Publisher?
Once your manuscript is polished, you face a key decision:
-
Self-publishing: Faster, more control, higher royalties—but you’ll manage everything (editing, design, distribution).
-
Traditional publishing: Slower, more competitive—but it offers broader distribution and industry recognition.
If you’re unsure which is right for you, I’ve guided clients through both paths. Click here to read a breakdown of how long the entire process can take.
Either way, your manuscript needs to be clean, well-formatted, and professionally edited before it hits the shelves—or the inbox of an agent or acquisitions editor.
The good news? Google Docs gets you most of the way there.
Hidden Google Docs Features Authors Shouldn’t Ignore
Google Docs looks deceptively simple—but under the hood, it has powerful tools most authors miss. These features can speed up your workflow, make collaboration easier, and help you stay organized throughout the writing process.
Here are five tools I regularly show clients—many of whom had no idea they existed:
1. Voice Typing
If you speak faster than you type—or just want to break through mental resistance—use Google Docs’ Voice Typing:
-
Go to
Tools > Voice typing -
Click the mic icon
-
Start speaking your thoughts out loud
This is perfect for idea dumps, first drafts, or days when your energy is high but your focus is low. Several of my clients have drafted entire chapters this way while walking or commuting.
2. Suggesting Mode (Like Track Changes in Word)
Instead of emailing edits back and forth, use Suggesting Mode:
-
Click the pencil icon in the top-right corner
-
Switch from “Editing” to “Suggesting”
Any edits now appear as tracked changes, just like in MS Word. Great for working with an editor, coach, or even a co-author.
3. Version History
As covered earlier, Google Docs automatically tracks every version of your manuscript:
-
File > Version history > See version history -
Label major milestones (e.g., “Post Beta,” “Final Edits”)
This eliminates the need for endless saved files and lets you revisit any earlier stage of your book with a single click.
4. Document Outline
Turn on the document outline pane for instant navigation:
-
Go to
View > Show outline -
Or click the list icon in the top-left toolbar
This creates a sidebar view of all your headings. If your book is longer than 10,000 words, this feature will save you hours of scrolling.
5. Templates and Add-Ons
Google Docs has a template gallery and a wide range of add-ons, but honestly—most aren’t built for book writing. That’s why I created a custom book template specifically designed for authors using Google Docs.
Save Hours with This Free Google Docs Book Template
Let’s face it—formatting your book shouldn’t take more time than writing it.
That’s why I created a ready-to-use Google Docs book template for authors like you. It’s the same template I’ve used with 130+ clients—from first-time authors to entrepreneurs and executive thought leaders.
This template isn’t just pretty—it’s built for momentum and clarity.
What’s Included:
-
A fully formatted title page
-
Proper heading styles (Heading 1 for chapters, Heading 2/3 for subheadings)
-
Pre-set font sizes, spacing, and page setup
-
Automatic Table of Contents
- Chapter layout that follows the structure I teach in client sessions
Most free templates you’ll find online are either bloated with design fluff or poorly structured for long-form writing. This one is different; it’s made by a writer, for writers.
You can [download the Google Docs book template here] and start writing today.
Make a copy to your Drive, plug in your title, and you’re ready to go—no tech headaches required.
Whether you’re writing a how-to book, a personal story, or a business manifesto, this template will help you stay organized and focused on what matters: your message.
This Is Where Your Book Actually Begins
Writing a book doesn’t start when the words hit the page—it starts when you decide to show up, consistently.
If you’ve read this far, you’re not casually curious. You’re serious about getting your book written. You’ve got the ideas. You’ve got the drive. Now you have the tools and structure to make it real.
All you need is:
-
A Google account
-
Two documents (outline + manuscript)
-
500 words a day
-
And a commitment to start writing, not keep planning
Google Docs won’t write the book for you. But it removes every technical excuse and gives you a clear, distraction-free path to your first (or next) manuscript.
If you want expert guidance, accountability, or support at any stage—whether you're developing your concept, stuck mid-draft, or preparing to publish—I’d love to help.
Book a free consultation here, and let’s talk about your goals.
You don’t need to wait for the perfect moment, tool, or title.
You just need to open Google Docs—and start.

Article by Leandre Larouche
Leandre Larouche is a writer, coach, and the founder of Trivium Writing.

.png?width=352&name=SERVICES%20IMAGES%20(24).png)
.png?width=352&name=SERVICES%20IMAGES%20(22).png)
.png?width=352&name=SERVICES%20IMAGES%20(31).png)